
Introduction
CSS selectors tell the browser which HTML elements to style.
For example:
p { color: blue;}This CSS selects all paragraph elements and makes their text blue.
Selectors are one of the most important parts of CSS because they connect your CSS rules to your HTML elements.
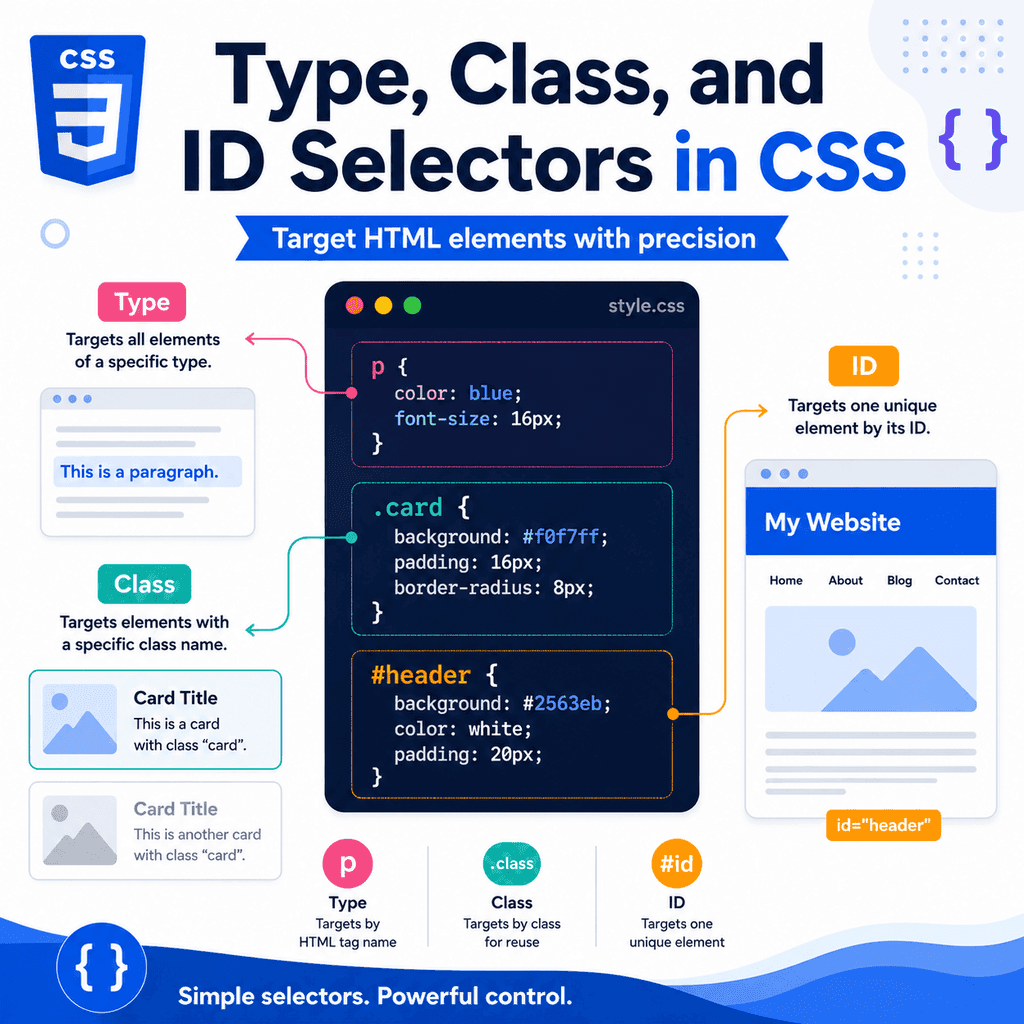
Three of the most common selector types are:
type selectorsclass selectorsID selectorsThese let you select elements by:
tag nameclass attributeID attributeFor example:
p { color: blue;}selects all <p> elements.
.note { color: blue;}selects elements with class="note".
#intro { color: blue;}selects the element with id="intro".
Understanding these three selectors gives you a strong foundation for styling HTML with CSS.
What Is a CSS Selector?
A CSS selector chooses which HTML elements a CSS rule should affect.
A basic CSS rule looks like this:
selector { property: value;}For example:
h1 { color: navy;}The selector is:
h1The declaration is:
color: navy;This tells the browser:
find all h1 elementsmake their text colour navyWithout a selector, the browser would not know which elements to style.
The Three Selector Types in This Article
This article focuses on three common selector types.
A type selector selects HTML elements by tag name:
p { color: #333333;}A class selector selects elements by class name:
.card { padding: 24px;}An ID selector selects one element by ID:
#main-content { max-width: 1000px;}A simple rule is:
type selector = element nameclass selector = reusable groupID selector = one unique elementWhat Is a Type Selector?
A type selector selects elements by their HTML tag name.
For example:
p { line-height: 1.6;}This selects all <p> elements on the page.
Another example:
h1 { font-size: 2.5rem;}This selects all <h1> elements.
Another example:
button { padding: 10px 16px;}This selects all <button> elements.
Type selectors are simple and useful when you want to style every element of a certain type.
Type Selector Example
HTML:
<h1>Welcome</h1> <p>This is the first paragraph.</p> <p>This is the second paragraph.</p>CSS:
p { color: #333333; line-height: 1.6;}This CSS applies to both paragraphs.
It does not apply to the <h1>.
The selector p means:
select every paragraph elementType selectors are broad because they target every matching tag.
Common Type Selectors
Common type selectors include:
bodyh1h2paimgullibuttonFor example:
body { font-family: Arial, sans-serif;}This styles the whole page body.
a { color: darkblue;}This styles all links.
When to Use Type Selectors
Use type selectors when you want to set broad, general styles.
For example:
body { font-family: Arial, sans-serif; line-height: 1.6;}This is a good use of a type selector because the body controls general page text.
Another useful example:
img { max-width: 100%; height: auto;}This helps all images shrink to fit their containers.
Another example:
p { margin-bottom: 1rem;}This gives all paragraphs consistent spacing.
Type selectors are good for default styles that should apply widely.
When Type Selectors Can Be Too Broad
Type selectors affect every matching element.
For example:
button { background-color: navy; color: white;}This applies to every button on the page.
That may be fine, but sometimes different buttons need different styles.
For example:
<button type=”submit”>Save</button><button type=”button”>Cancel</button>If the buttons need different appearances, classes are usually better:
<button class=”button button-primary” type=”submit”>Save</button><button class=”button button-secondary” type=”button”>Cancel</button>CSS:
.button { padding: 10px 16px;} .button-primary { background-color: navy; color: white;} .button-secondary { background-color: white; color: navy;}Use type selectors for broad styles.
Use classes for reusable variations.
What Is a Class Selector?
A class selector selects elements with a specific class attribute.
HTML:
<p class=”note”>This is a note.</p>CSS:
.note { background-color: #f5f5f5;}The dot before note tells CSS that this is a class selector.
The selector:
.notematches elements with:
class=”note”Classes are reusable.
You can use the same class on many elements.
Class Selector Example
HTML:
<p class=”note”>First note.</p><p class=”note”>Second note.</p><p class=”note”>Third note.</p>CSS:
.note { padding: 12px; border: 1px solid #cccccc;}All three paragraphs receive the same styling.
This is one of the main advantages of classes.
A class can style a group of related elements.
The Dot in Class Selectors
Class selectors use a dot:
.note { color: blue;}The dot means:
select elements with class=”note”Do not write the dot in the HTML class value.
Correct HTML:
<p class=”note”>This is a note.</p>Incorrect HTML:
<p class=”.note”>This is a note.</p>The dot is only used in the CSS selector.
The class attribute value does not include the dot.
Multiple Elements Can Share One Class
A class can be used on many elements.
For example:
<p class=”highlight”>Important paragraph.</p> <li class=”highlight”>Important list item.</li> <span class=”highlight”>Important word.</span>CSS:
.highlight { font-weight: bold;}This rule applies to all three elements because they all have class="highlight".
The elements are different types, but they share the same class.
Classes are useful when you want repeated styling across different parts of a page.
One Element Can Have Multiple Classes
An element can have more than one class.
Example:
<p class=”message warning”>Your password is too short.</p>This paragraph has two classes:
messagewarningYou can style all messages:
.message { padding: 12px;}You can also style warnings:
.warning { font-weight: bold;}Both rules can apply to the same element.
This lets you combine reusable styles.
Class Names with Hyphens
Class names often use lowercase words separated by hyphens.
Examples:
<article class=”lesson-card”><p class=”error-message”><button class=”primary-button”>The matching CSS selectors are:
.lesson-card { padding: 24px;}.error-message { color: red;}.primary-button { padding: 10px 16px;}Hyphens are part of the class name.
They do not split the class into separate classes.
Spaces Create Multiple Classes
This is one class:
<p class=”error-message”>Error text.</p>The matching selector is:
.error-message { color: red;}This is two classes:
<p class=”error message”>Error text.</p>The classes are:
errormessageYou can target them separately:
.error { color: red;} .message { font-weight: bold;}A space separates class names.
A hyphen is part of a class name.
When to Use Class Selectors
Use class selectors for reusable styling.
For example:
<article class=”card”> <h2>HTML</h2> <p>Learn how pages are structured.</p></article> <article class=”card”> <h2>CSS</h2> <p>Learn how pages are styled.</p></article>CSS:
.card { padding: 24px; border: 1px solid #dddddd; border-radius: 8px;}The same class styles both cards.
Classes are also useful for buttons, messages, layouts, forms, navigation, and repeated components.
What Is an ID Selector?
An ID selector selects an element with a specific id attribute.
HTML:
<section id=”intro”> <h2>Introduction</h2></section>CSS:
#intro { padding: 32px;}The hash symbol before intro tells CSS this is an ID selector.
The selector:
#intromatches the element with:
id=”intro”An ID should be unique on the page.
That means the same ID value should not be used on multiple elements in the same HTML document.
ID Selector Example
HTML:
<header id=”site-header”> <h1>My Website</h1></header>CSS:
#site-header { padding: 24px;}This selects the element with:
id=”site-header”The rule does not apply to all headers.
It applies only to the element with that exact ID.
This is useful when you need to target one specific element.
The Hash Symbol in ID Selectors
ID selectors use a hash symbol:
#main-content { max-width: 1000px;}The hash symbol means:
select the element with id=”main-content”Do not write the hash symbol in the HTML ID value.
Correct HTML:
<main id=”main-content”>Incorrect HTML:
<main id=”#main-content”>The hash symbol belongs in the CSS selector, not in the HTML attribute value.
IDs Should Be Unique
An ID should be used once per page.
Good:
<header id=”site-header”>…</header><main id=”main-content”>…</main><footer id=”site-footer”>…</footer>Each ID is unique.
Avoid:
<section id=”content”>First section</section><section id=”content”>Second section</section>This repeats the same ID.
Duplicate IDs can cause problems with CSS, JavaScript, links, form labels, and accessibility relationships.
Use classes when several elements need the same styling.
When to Use ID Selectors
Use ID selectors when you need to target one specific element.
For example:
<main id=”main-content”>CSS:
#main-content { max-width: 1000px; margin: 0 auto;}IDs are also useful for page links.
Example:
<a href=”#contact”>Go to contact section</a> <section id=”contact”> <h2>Contact Us</h2></section>The link points to the section with:
id=”contact”IDs are useful for unique anchors and specific elements.
For reusable styling, classes are usually more flexible.
Type vs Class vs ID Selectors
These selectors look different in CSS.
Type selector:
p { color: blue;}Class selector:
.note { color: blue;}ID selector:
#intro { color: blue;}The matching HTML might be:
<p>This paragraph is selected by the type selector.</p> <p class=”note”>This paragraph is selected by the class selector.</p> <section id=”intro”>This section is selected by the ID selector.</section>A simple memory aid is:
element name = type selectordot = class selectorhash = ID selectorComparing the Three Selector Types
Type selectors are broad.
They select all elements with a given tag name.
p { line-height: 1.6;}Class selectors are reusable.
They select elements with a given class.
.card { padding: 24px;}ID selectors are specific.
They select one element with a given ID.
#site-header { padding: 24px;}Use the selector that matches the job.
Do not use IDs for repeated styles.
Do not use type selectors when you only want to target one part of the page.
Using Type and Class Selectors Together
You can combine a type selector and class selector.
For example:
p.note { color: blue;}This selects only <p> elements with class="note".
It matches:
<p class=”note”>This matches.</p>It does not match:
<div class=”note”>This does not match p.note.</div>because the element is a <div>, not a <p>.
This kind of selector is more specific than .note alone.
Use it when you genuinely need to target a class only on a specific element type.
Using Type and ID Selectors Together
You can also combine a type selector and an ID selector.
Example:
section#intro { padding: 32px;}This selects a <section> element with id="intro".
It matches:
<section id=”intro”>…</section>It does not match:
<div id=”intro”>…</div>because the selector expects a <section>.
In many cases, #intro is enough.
Only add the type selector if it improves clarity or solves a specific problem.
Styling All Elements of a Type Except Some Special Ones
You might use a type selector for general styles and classes for exceptions.
Example:
p { color: #333333; line-height: 1.6;} .intro { font-size: 1.2rem; font-weight: bold;}HTML:
<p class=”intro”>This is the introduction.</p><p>This is a normal paragraph.</p>Both paragraphs receive the p styles.
The intro paragraph also receives the .intro styles.
This is a common pattern.
Use type selectors for base styles.
Use classes for special cases.
Specificity Basics
CSS specificity helps the browser decide which rule wins when multiple rules target the same element.
For example:
p { color: black;} .intro { color: blue;}HTML:
<p class=”intro”>Welcome to the page.</p>Both rules target the paragraph.
The class selector is more specific than the type selector, so the text becomes blue.
A basic order from less specific to more specific is:
type selectorclass selectorID selectorThis is a simplified explanation, but it is enough to understand many common cases.
Specificity Example with Type, Class, and ID
CSS:
p { color: black;} .intro { color: blue;} #main-intro { color: green;}HTML:
<p id=”main-intro” class=”intro”>Welcome to the page.</p>All three rules target the same paragraph.
The type selector says black.
The class selector says blue.
The ID selector says green.
The paragraph will usually appear green because the ID selector is the most specific of these three.
This is why IDs should be used carefully in CSS.
They can be harder to override.
Why Classes Are Usually Best for Styling
Classes are usually the best choice for reusable styling.
For example:
<article class=”card”>…</article><article class=”card”>…</article><article class=”card”>…</article>CSS:
.card { padding: 24px; border: 1px solid #dddddd;}This is clean and reusable.
If you used IDs instead, each card would need a different ID:
<article id=”card-one”>…</article><article id=”card-two”>…</article><article id=”card-three”>…</article>Then the CSS would be more repetitive:
#card-one,#card-two,#card-three { padding: 24px;}Classes are more flexible for repeated patterns.
A Complete Example
Here is a complete HTML and CSS example using type, class, and ID selectors.
HTML:
<!DOCTYPE html><html lang=”en”><head> <meta charset=”UTF-8″> <title>Selector Example</title> <link rel=”stylesheet” href=”styles.css”></head><body> <header id=”site-header”> <h1>CSS Selectors</h1> </header> <main id=”main-content”> <p class=”intro”> This page shows how type, class, and ID selectors work. </p> <section class=”card”> <h2>Type Selectors</h2> <p>Type selectors target HTML elements by tag name.</p> </section> <section class=”card”> <h2>Class Selectors</h2> <p>Class selectors target elements by class name.</p> </section> <section class=”card featured-card”> <h2>ID Selectors</h2> <p>ID selectors target one unique element by ID.</p> </section> </main> </body></html>CSS:
/* Type selectors */body { font-family: Arial, sans-serif; line-height: 1.6;} h1 { color: navy;} p { color: #333333;} /* ID selectors */#site-header { padding: 24px;} #main-content { width: 90%; max-width: 900px; margin: 0 auto;} /* Class selectors */.intro { font-size: 1.2rem; font-weight: bold;} .card { padding: 24px; border: 1px solid #dddddd; margin-bottom: 16px;} .featured-card { border-width: 2px;}This example uses type selectors for general page styling, IDs for unique layout areas, and classes for reusable components.
How the Complete Example Works
The type selector:
p { color: #333333;}styles all paragraphs.
The ID selector:
#main-content { width: 90%; max-width: 900px; margin: 0 auto;}styles the one element with id="main-content".
The class selector:
.card { padding: 24px; border: 1px solid #dddddd; margin-bottom: 16px;}styles every element with class="card".
The featured card has two classes:
<section class=”card featured-card”>So it receives both .card styles and .featured-card styles.
Common Mistake: Forgetting the Dot for Classes
Incorrect:
card { padding: 24px;}if the HTML is:
<article class=”card”>Correct:
.card { padding: 24px;}Without the dot, CSS looks for an element called <card>.
With the dot, CSS selects elements with class="card".
Common Mistake: Forgetting the Hash for IDs
Incorrect:
main-content { max-width: 900px;}if the HTML is:
<main id=”main-content”>Correct:
#main-content { max-width: 900px;}Without the hash, CSS looks for an element called <main-content>.
With the hash, CSS selects the element with id="main-content".
Common Mistake: Using the Same ID More Than Once
Incorrect:
<section id=”card”>First card</section><section id=”card”>Second card</section>Better:
<section class=”card”>First card</section><section class=”card”>Second card</section>Use a class when the same style applies to multiple elements.
Use an ID when you need one unique element.
Common Mistake: Using a Type Selector When a Class Is Needed
This may be too broad:
section { padding: 32px; border: 1px solid #dddddd;}It applies to every section.
If only some sections should look like cards, use a class:
<section class=”card”>…</section>CSS:
.card { padding: 32px; border: 1px solid #dddddd;}Classes give you more control.
Common Mistake: Using IDs for Reusable Styles
Less flexible:
<article id=”card-one”>…</article><article id=”card-two”>…</article>Better:
<article class=”card”>…</article><article class=”card”>…</article>CSS:
.card { padding: 24px;}If a style is reused, use a class.
IDs are not designed for repeated styling patterns.
Common Mistake: Class Name Mismatch
CSS:
.lesson-card { padding: 24px;}HTML:
<article class=”lesson”>The CSS will not apply because the class names do not match.
Correct HTML:
<article class=”lesson-card”>or correct CSS:
.lesson { padding: 24px;}Class names must match exactly.
Common Mistake: Writing the Dot or Hash in HTML
Incorrect:
<p class=”.intro”>Welcome.</p>Correct:
<p class=”intro”>Welcome.</p>Incorrect:
<main id=”#main-content”>Correct:
<main id=”main-content”>The dot and hash are CSS selector symbols.
They are not part of the HTML attribute value.
Common Mistake: Overusing ID Selectors
ID selectors are powerful because they are highly specific.
For example:
#intro { color: navy;}This can be harder to override later than a class selector.
For most styling, prefer classes:
.intro { color: navy;}Use IDs mainly for unique sections, page anchors, and specific JavaScript targets.
Use classes for styling components and repeated patterns.
Best Practices
Use type selectors for broad element styles.
Use class selectors for reusable styles and components.
Use ID selectors for unique elements.
Use . for class selectors.
Use # for ID selectors.
Do not include . or # inside HTML class or ID values.
Keep class and ID names clear and meaningful.
Use classes more often than IDs for styling.
Avoid duplicate IDs.
Use type selectors carefully because they affect every matching element.
Use classes when you need more control.
Check that selectors match the HTML exactly.
Use browser developer tools when a selector does not apply.
Summary
CSS selectors choose which HTML elements to style.
A type selector selects elements by tag name:
p { color: blue;}A class selector selects elements by class name:
.note { color: blue;}An ID selector selects one element by ID:
#intro { color: blue;}Type selectors are useful for broad element styles.
Class selectors are useful for reusable styles and components.
ID selectors are useful for unique elements and page anchors.
The main symbols to remember are:
no symbol = type selector. = class selector# = ID selectorOnce you understand type, class, and ID selectors, you can target HTML elements much more precisely and write cleaner CSS.