
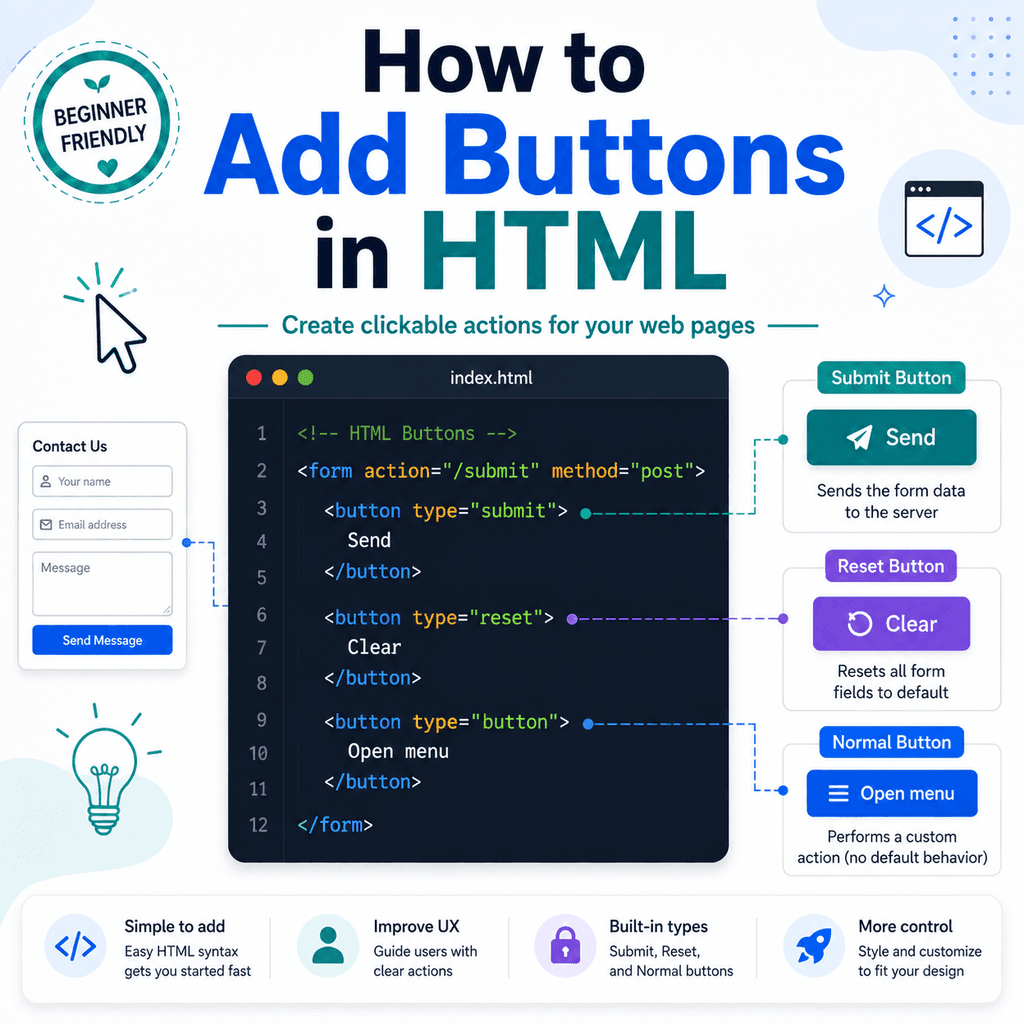
Buttons allow users to perform actions on a web page.
In HTML forms, buttons are often used to submit form data or reset form fields. Buttons can also be used for other actions, such as opening a menu, closing a popup, showing extra content, or triggering JavaScript.
The main element used for buttons is:
<button>A simple button looks like this:
<button type=”button”>Click me</button>The text between the opening and closing tags is what the user sees on the button.
Introduction
What Is the <button> Element?
The <button> element creates a clickable button.
For example:
<button type=”button”>Show more</button>This creates a normal button with the visible text:
Show moreUnlike the <input> element, the <button> element has an opening tag and a closing tag.
Correct:
<button type=”button”>Open menu</button>Incorrect:
<button type=”button”>The button text or content should go between the opening and closing tags.
The type Attribute
The type attribute tells the browser what kind of button it is.
The three main button types are:
type=”submit”type=”reset”type=”button”These types behave differently, especially when the button is inside a form.
A submit button submits a form.
A reset button resets form fields.
A normal button does not submit or reset anything by itself.
Submit Buttons
A submit button sends the form data when the user activates it.
For example:
<form action=”/contact” method=”post”> <label for=”name”>Name</label> <input type=”text” id=”name” name=”name”> <button type=”submit”>Send</button></form>When the user clicks the “Send” button, the browser submits the form.
The action attribute tells the browser where to send the form data.
The method attribute tells the browser how to send it.
A Simple Submit Button
The most common form button is a submit button:
<button type=”submit”>Submit</button>You can use clearer button text depending on the form:
<button type=”submit”>Send message</button><button type=”submit”>Create account</button><button type=”submit”>Search</button>Good button text should describe what will happen.
For example, “Send message” is more specific than “Submit”.
Submit Buttons Inside Forms
Submit buttons are usually placed inside a <form> element.
For example:
<form action=”/signup” method=”post”> <label for=”email”>Email address</label> <input type=”email” id=”email” name=”email”> <button type=”submit”>Sign up</button></form>The button belongs to the form because it is inside the <form> element.
When clicked, it submits the fields in that form.
Reset Buttons
A reset button clears or restores the form fields to their initial values.
For example:
<form> <label for=”search”>Search</label> <input type=”search” id=”search” name=”q”> <button type=”reset”>Clear</button></form>If the user types into the field and then clicks “Clear”, the field is reset.
A reset button uses:
type=”reset”Be Careful with Reset Buttons
Reset buttons can be useful in some situations, but they can also be frustrating.
If a user spends time filling out a form and accidentally clicks a reset button, their input may be lost.
For that reason, many modern forms do not include reset buttons unless there is a clear need.
A reset button may be useful for a search or filter form:
<form> <label for=”filter”>Filter results</label> <input type=”search” id=”filter” name=”filter”> <button type=”submit”>Apply filter</button> <button type=”reset”>Clear filter</button></form>In this case, clearing the filter may be helpful.
For longer forms, use reset buttons carefully.
Normal Buttons with type="button"
A normal button uses:
type=”button”For example:
<button type=”button”>Open menu</button>This button does not submit a form or reset fields by itself.
It is usually used with JavaScript.
For example, a normal button might be used to:
open a menuclose a popupshow more contentswitch tabsstart an animationcopy texttoggle dark modeThe HTML creates the button. JavaScript can add the behaviour.
Why type="button" Matters
Inside a form, a <button> without a type attribute may behave as a submit button by default.
For example:
<form> <input type=”text” name=”name”> <button>Help</button></form>The “Help” button may submit the form when clicked.
If the button is not meant to submit the form, write:
<button type=”button”>Help</button>This prevents accidental form submission.
As a good habit, always include the type attribute on buttons.
Buttons Outside Forms
Buttons can also appear outside forms.
For example:
<button type=”button”>Open navigation menu</button>A button outside a form usually needs JavaScript to do something.
For example, it might open a mobile menu or close a modal window.
Without JavaScript, a normal button may be clickable but not perform any visible action.
That is not necessarily wrong, but it means the behaviour has not been added yet.
Button Text Should Be Clear
Button text should tell users what the button does.
Less clear:
<button type=”submit”>Submit</button>Often better:
<button type=”submit”>Send message</button>Less clear:
<button type=”button”>Click here</button>Better:
<button type=”button”>Show details</button>Clear button text helps users understand what will happen before they click.
Button vs Link
Buttons and links are different.
Use a link when the user is going somewhere:
<a href=”contact.html”>Contact us</a>Use a button when the user is performing an action:
<button type=”button”>Open menu</button>Use a submit button when the user is submitting a form:
<button type=”submit”>Send message</button>A simple rule is:
Link = navigationButton = actionSubmit button = form submissionDo not use a <div> or <span> as a fake button.
Using <button> Instead of <input type="button">
HTML also allows button-like inputs, such as:
<input type=”submit” value=”Send”><input type=”reset” value=”Clear”><input type=”button” value=”Open menu”>These can work.
However, the <button> element is often more flexible because it can contain text and other inline content.
For example:
<button type=”submit”> Send message</button>You can also include an icon or styled text inside a button if needed:
<button type=”button”> <span>Open menu</span></button>For simple forms, either approach can work, but <button> is usually easier to expand and style.
Buttons and Accessibility
Buttons should be understandable to all users, including people using keyboards and assistive technologies.
The <button> element is already keyboard-accessible by default.
Users can usually focus a button with the keyboard and activate it with keys such as Enter or Space.
This is one reason you should use a real <button> element instead of a clickable <div>.
Less accessible:
<div class=”button”>Open menu</div>Better:
<button type=”button”>Open menu</button>The real button gives browsers and assistive technologies the correct meaning and behaviour.
Buttons with Icons
Some buttons include icons.
For example:
<button type=”button”> 🔍 Search</button>If the button has both an icon and visible text, the visible text usually gives enough meaning.
If a button only uses an icon, it still needs an accessible name.
For example:
<button type=”button” aria-label=”Search”> 🔍</button>The aria-label gives the button a text label for assistive technologies.
For most beginner projects, visible text is usually the simplest and clearest option.
Disabled Buttons
A button can be disabled with the disabled attribute.
For example:
<button type=”submit” disabled>Send</button>A disabled button cannot usually be clicked or focused.
This can be useful when a button should not be available yet.
For example, a form might disable the submit button until required fields are complete.
However, be careful. If a disabled button is not explained, users may not know why they cannot use it.
Visible instructions can help:
<p>Please complete all required fields before sending.</p><button type=”submit” disabled>Send</button>Styling Buttons with CSS
HTML creates the button and gives it meaning.
CSS controls how it looks.
For example:
<button class=”primary-button” type=”submit”>Send message</button>CSS:
.primary-button { padding: 10px 16px; border: none; border-radius: 6px; cursor: pointer;}You can style buttons with colours, spacing, borders, fonts, hover states, and focus states.
However, make sure the button still looks clearly clickable and remains easy to read.
Focus Styles
When users navigate with a keyboard, they need to see which button is focused.
Browsers provide default focus styles, but they are sometimes removed by mistake.
Avoid removing focus outlines without replacing them.
Avoid this:
button { outline: none;}If you customise focus styles, make sure they are still visible:
button:focus { outline: 2px solid #3366cc; outline-offset: 2px;}Visible focus styles are important for keyboard accessibility.
A Contact Form with Submit and Reset Buttons
Here is a simple form with a submit button and a reset button:
<form action=”/contact” method=”post”> <div> <label for=”name”>Name</label> <input type=”text” id=”name” name=”name”> </div> <div> <label for=”email”>Email address</label> <input type=”email” id=”email” name=”email”> </div> <button type=”submit”>Send message</button> <button type=”reset”>Clear form</button></form>The submit button sends the form.
The reset button clears the form fields.
For a short form, this may be acceptable.
For a long form, think carefully before adding a reset button.
A Button for JavaScript Behaviour
Here is a normal button that could be used with JavaScript:
<button type=”button” id=”menu-button”>Open menu</button>The button has:
type=”button”so it does not submit a form.
It also has:
id=”menu-button”so JavaScript can find it.
For example, JavaScript could later use this ID to open and close a menu.
The HTML button is still useful even before you add the JavaScript, because it gives the action a proper interactive element.
A Complete Example
Here is a complete HTML page using submit, reset, and normal buttons:
<!DOCTYPE html><html lang=”en”><head> <meta charset=”UTF-8″> <title>Button Example</title></head><body> <h1>HTML Button Example</h1> <button type=”button”>Open menu</button> <form action=”/contact” method=”post”> <div> <label for=”name”>Name</label> <input type=”text” id=”name” name=”name”> </div> <div> <label for=”email”>Email address</label> <input type=”email” id=”email” name=”email”> </div> <button type=”submit”>Send message</button> <button type=”reset”>Clear form</button> </form> </body></html>This example uses:
<button type=”button”>for a normal button,
<button type=”submit”>for a submit button,
and:
<button type=”reset”>for a reset button.
Common Mistake: Forgetting the Button Type
A common mistake is writing a button inside a form without a type attribute.
Risky:
<form> <input type=”text” name=”name”> <button>Help</button></form>The button may submit the form.
Better:
<form> <input type=”text” name=”name”> <button type=”button”>Help</button></form>Always include the button type so the behaviour is clear.
Common Mistake: Using Reset Buttons Too Freely
A reset button can erase user input.
Avoid adding reset buttons to long forms unless users clearly need that option.
Less careful:
<form> <input type=”text” name=”first-name”> <input type=”text” name=”last-name”> <input type=”email” name=”email”> <textarea name=”message”></textarea> <button type=”submit”>Send</button> <button type=”reset”>Reset</button></form>A user could accidentally erase everything.
If you do include a reset button, use clear text:
<button type=”reset”>Clear form</button>This is clearer than just “Reset”.
Common Mistake: Using a Link as a Button
If the user is performing an action, use a button.
Less appropriate:
<a href=”#” class=”button”>Open menu</a>Better:
<button type=”button” class=”button”>Open menu</button>Use links for navigation.
Use buttons for actions.
Common Mistake: Using a Div as a Button
Avoid this:
<div class=”button”>Send message</div>A <div> is not a real button. It does not have the same built-in keyboard and accessibility behaviour.
Better:
<button type=”submit”>Send message</button>Use real button elements for button actions.
Common Mistake: Vague Button Text
Button text should describe the action.
Weak:
<button type=”submit”>Go</button>Better:
<button type=”submit”>Search</button>Weak:
<button type=”button”>Click here</button>Better:
<button type=”button”>Show delivery options</button>Clear button text helps users understand what will happen.
Best Practices
Use <button> to create clickable buttons.
Always include the type attribute.
Use type="submit" to submit a form.
Use type="reset" to reset form fields.
Use type="button" for normal buttons that do not submit a form.
Use clear button text.
Use links for navigation and buttons for actions.
Be careful with reset buttons because they can erase user input.
Use real <button> elements instead of clickable <div> elements.
Keep buttons keyboard accessible.
Do not remove focus styles unless you replace them with visible alternatives.
Use CSS to style buttons, but keep them recognisable and readable.
Summary
The <button> element creates a clickable button in HTML.
A normal button looks like this:
<button type=”button”>Open menu</button>A submit button sends a form:
<button type=”submit”>Send message</button>A reset button clears or restores form fields:
<button type=”reset”>Clear form</button>The type attribute is important because it controls the button’s behaviour.
Use submit buttons for forms, reset buttons only when clearing fields is genuinely useful, and normal buttons for actions handled by JavaScript.
Use clear button text and real button elements to make your HTML more understandable, accessible, and reliable.